Enter a realm of culinary discovery dedicated to the art of inclusive eating – Gluten-Free Recipes. In these gastronomic pages, we embark on a journey that balances the pleasures of taste with the necessities of diet. As we browse this collection, we discover a treasure trove of dishes carefully crafted for a gluten-free lifestyle.
From delicious baked goods to savory delights, each recipe demonstrates ingenuity in transforming ingredients while maintaining flavor and texture. With each dish, we celebrate the marriage of culinary creativity and nutritional awareness, ensuring that every bite is a testament to enjoyment and well-being.
9 Healthy Gluten-Free Recipes
Grilled Chicken with Roasted Vegetables
Gluten-Free Recipes
Utensils needed:
Ingredients:
For Roasted Vegetables:
- Preheat the oven to 400°F (200°C) and line a baking sheet with parchment paper.
- In a mixing bowl, toss the chopped vegetables with olive oil, minced garlic, chopped fresh herbs, salt, and pepper.
- Spread the vegetables evenly on the baking sheet.
- Roast the vegetables in the preheated oven for about 20-25 minutes, or until they’re tender and slightly caramelized.
For Grilled Chicken:
- Preheat the grill or grill pan over medium-high heat.
- Season the chicken breasts or thighs with olive oil, lemon juice, chopped fresh herbs, salt, and pepper.
- Place the chicken on the grill and cook for about 6-8 minutes on each side, or until the internal temperature reaches 165°F (74°C) and the chicken is cooked through.
- Use tongs to flip the chicken and ensure even cooking.
To Serve:
- Arrange the grilled chicken on a plate.
- Serve the roasted vegetables alongside the chicken.
- Garnish with additional fresh herbs and a drizzle of lemon juice if desired.
- Enjoy the grilled chicken and roasted vegetables as a wholesome and flavorful meal.
Grilled chicken with roasted vegetables, a testament to simplicity and wholesome flavors, beckons us to celebrate the beauty of balance on our plates. As the grill heats, chicken breasts or thighs await their transformation—olive oil’s caress, a sprinkle of fresh herbs, a whisper of lemon juice, salt, and pepper. On the baking sheet, a dance of colors unfolds as bell peppers, zucchini, carrots, and red onion join hands, mingling with olive oil, garlic, and herbs.
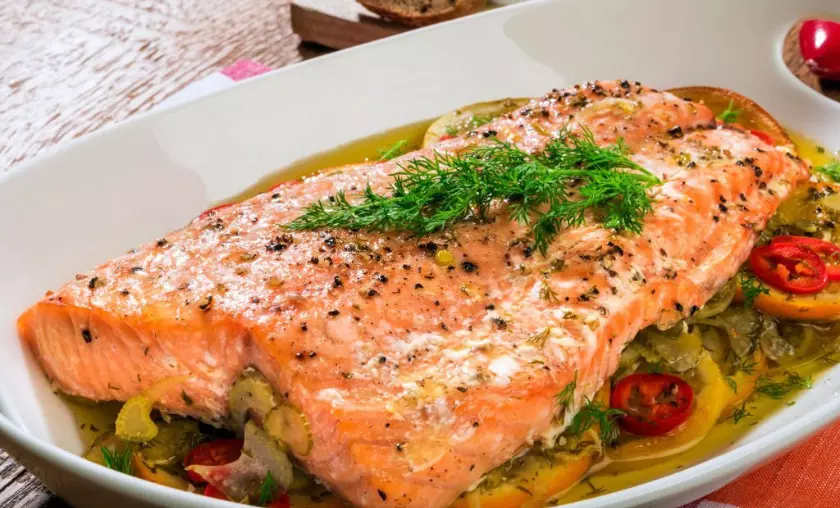
Baked Salmon with Lemon-Dill Sauce
Gluten-Free Recipes
Utensils Needed:
Ingredients:
For Baked Salmon:
- Preheat the Oven to 375°f (190°c) and Grease a Baking Dish.
- Place the Salmon Fillets in the Baking Dish.
- Drizzle Olive Oil Over the Salmon and Season With Salt, Pepper, and a Sprinkle of Garlic Powder.
- Lay Thin Lemon Slices on Top of Each Fillet.
- Bake the Salmon in the Preheated Oven for About 12-15 Minutes, or Until the Salmon is Cooked Through and Flakes Easily With a Fork.
For Lemon-dill Sauce:
- In a Mixing Bowl, Combine Greek Yogurt or Mayonnaise, Chopped Fresh Dill, Lemon Juice, and Dijon Mustard.
- Whisk the Mixture Until Well Combined.
- Season the Sauce With a Pinch of Salt and Pepper to Taste.
To Serve:
- Place the Baked Salmon Fillets on Individual Plates or a Serving Platter.
- Drizzle the Lemon-dill Sauce Over the Salmon Fillets.
- Garnish With Additional Fresh Dill and Lemon Slices if Desired.
- Serve the Baked Salmon With Lemon-dill Sauce as a Light and Flavorful Main Course.
Baked salmon with lemon-dill sauce, a symphony of flavors and elegance, invites us to savor the harmony of delicate fish and vibrant accents. As the oven preheats, salmon fillets await their turn—a drizzle of olive oil, a dusting of salt, pepper, and a whisper of garlic powder. Lemon slices, thinly cut like sunlit petals, lay atop the fillets, a promise of citrus brightness. In the oven’s embrace, the salmon transforms, flaking gently to reveal its tenderness.
Stuffed Bell Peppers
Gluten-Free Recipes
Utensils Needed:
Ingredients:
- Preheat the Oven to 375°f (190°c) and Grease a Baking Dish.
- Place the Halved Bell Peppers in the Baking Dish, Cut Side Up.
- In a Skillet, Heat a Drizzle of Olive Oil Over Medium Heat.
- If Using Ground Meat, Add It to the Skillet and Cook Until Browned. Drain Excess Fat if Necessary.
- Add Chopped Onion to the Skillet and Sauté Until It’s Softened.
- Stir in Minced Garlic and Cook Until Fragrant.
- Add Cooked Rice, Canned Diced Tomatoes, and Tomato Sauce to the Skillet. Mix Well to Combine.
- Season the Mixture With Salt, Pepper, and Chopped Fresh Herbs.
- Fill Each Bell Pepper Half With the Rice and Meat Mixture.
- Top Each Stuffed Pepper With Shredded Cheese.
- Cover the Baking Dish With Aluminum Foil and Bake in the Preheated Oven for About 25-30 Minutes, or Until the Peppers Are Tender.
- Remove the Foil and Bake for an Additional 5-10 Minutes, or Until the Cheese is Melted and Bubbly.
- Once Cooked, Remove the Stuffed Bell Peppers From the Oven and Let Them Cool Slightly Before Serving.
Stuffed bell peppers, a harmonious blend of colors and flavors, beckon us to explore the art of filling nature’s vessels with wholesome goodness. As the oven preheats, bell peppers lay cut side up, like vibrant cups awaiting their fill. In the skillet’s warmth, ground meat sizzles—a canvas of options, from the richness of beef to the lean embrace of turkey. Onions sauté, their fragrance a prelude to garlic’s aromatic dance. Cooked rice, diced tomatoes, and tomato sauce find their way to the skillet, mingling with herbs and seasoning in a symphony of taste.
Rice Paper Spring Rolls
Gluten-Free Recipes
Utensils Needed:
Ingredients:
- Prepare All the Filling Ingredients: Cook and Drain the Rice Vermicelli Noodles, Slice or Julienne the Vegetables, and Pick the Fresh Herbs.
- Fill a Large Bowl With Warm Water.
- Dip a Rice Paper Wrapper Into the Warm Water for About 10-15 Seconds, or Until It Becomes Soft and Pliable.
- Place the Damp Rice Paper on a Clean, Damp Kitchen Towel or a Rice Paper Wrappers Container.
- On the Bottom Third of the Rice Paper, Layer a Few Leaves of Lettuce, a Small Handful of Rice Vermicelli Noodles, Sliced Vegetables, Herbs, and Cooked Protein if Using.
- Fold the Sides of the Rice Paper Over the Filling.
- Begin Rolling the Rice Paper Tightly From the Bottom, Folding Over the Filling as You Go.
- Continue Rolling Until You Have a Neat and Compact Spring Roll.
- Repeat the Process With the Remaining Ingredients.
- Arrange the Rice Paper Spring Rolls on a Serving Platter or Dish.
- Serve the Spring Rolls With a Dipping Sauce of Your Choice, Such as Peanut Sauce or Hoisin Sauce.
Rice paper spring rolls, delicate wraps of freshness and flavor, invite us to embrace the art of assembling a vibrant culinary bouquet. In a bowl of warm water, rice paper wrappers soften, their transformation a dance of texture and transparency. With each dip, they become pliable canvases that await their filling.
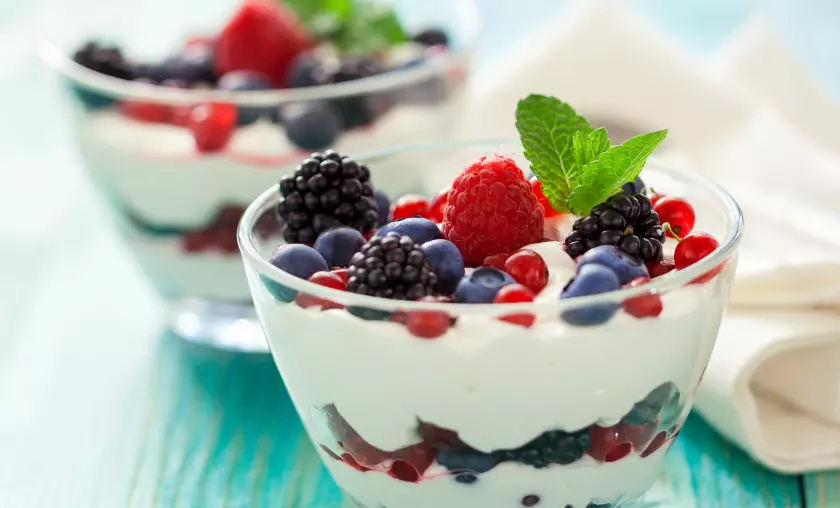
Fruit Parfait
Gluten-Free Recipes
Utensils Needed:
Ingredients:
- Start by Layering the Bottom of a Glass or Serving Dish With a Spoonful of Greek Yogurt or Yogurt.
- Add a Layer of Diced or Sliced Fresh Fruits on Top of the Yogurt.
- Sprinkle a Layer of Granola or Muesli Over the Fruits.
- Repeat the Layers: Yogurt, Fruits, and Granola, Until the Glass or Dish is Filled or You’ve Reached Your Desired Amount.
- If Desired, Drizzle a Touch of Honey or Maple Syrup Over the Layers for Added Sweetness.
- Garnish the Top With Additional Fresh Fruits and a Sprinkle of Nuts or Seeds for Texture and Flavor.
- Repeat the Layering Process for Each Parfait You’re Preparing.
- Serve the Fruit Parfaits Immediately or Refrigerate Until Ready to Enjoy.
Fruit parfaits, a symphony of colors and layers, invite us to savor the harmony of wholesome ingredients in a single, elegant glass. As the glass is held, Greek yogurt or your chosen yogurt creates the canvas—a creamy beginning that promises both nourishment and indulgence. Fresh fruits, each a jewel of nature’s palette, dance onto the stage, their vibrant hues an invitation to explore. Mango’s sweetness, berries’ tartness, and banana’s creaminess form a chorus of flavors that resonate.
Chickpea & Spinach Curry
Gluten-Free Recipes
Utensils Needed:
Ingredients:
- In a Large Pot or Skillet, Heat a Drizzle of Olive Oil Over Medium Heat.
- Add Chopped Onion and Sauté Until It’s Softened and Translucent.
- Stir in Minced Garlic and Grated Ginger, and Cook Until Fragrant.
- Sprinkle Curry Powder, Ground Cumin, Ground Coriander, and Turmeric Powder Over the Onion Mixture. Stir to Coat the Onions With the Spices.
- Pour in Canned Diced Tomatoes, Along With Their Juices. Stir Well to Combine.
- Add Cooked Chickpeas to the Pot and Mix Them With the Tomato-spice Mixture.
- Pour in Coconut Milk and Let the Mixture Simmer for About 10-15 Minutes, Allowing the Flavors to Meld.
- Add Fresh Spinach Leaves to the Pot and Let Them Wilt in the Curry.
- Season the Curry With Salt and Pepper to Taste.
- Once the Spinach is Wilted and the Flavors Are Well Combined, Remove the Pot From Heat.
- Serve the Chickpea and Spinach Curry Hot, Garnished With Fresh Cilantro Leaves.
- Enjoy the Curry With Rice or Flatbread.
Chickpea and spinach curry, a symphony of protein and greens, calls us to explore the magic of spices and nourishing ingredients in each fragrant bite. In the pot’s warmth, onions sauté—a promise of depth and flavor to come. Garlic’s aroma and grated ginger’s zing join the ensemble, a chorus of fragrance and allure. Curry powder, cumin, coriander, and turmeric paint a canvas of colors and aromas, a dance of spices that ignites the senses.
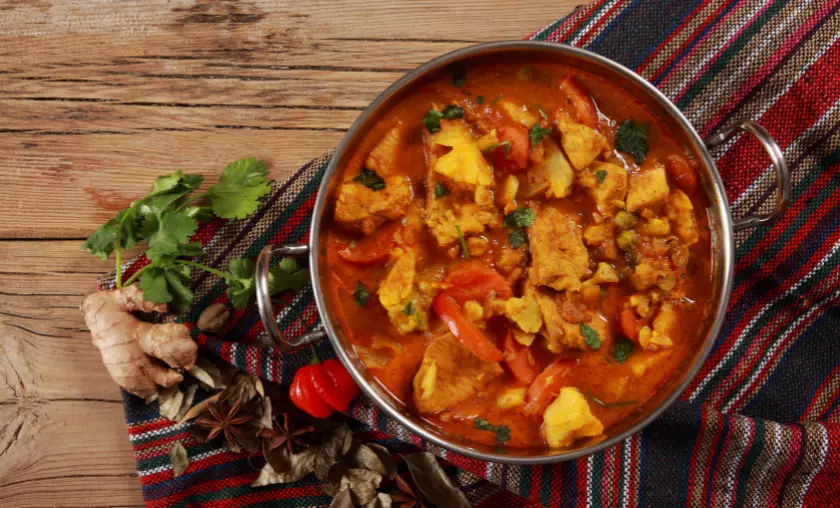
Chicken & Vegetable Curry
Gluten-Free Recipes
Utensils Needed:
Ingredients:
- In a Large Pot or Skillet, Heat a Drizzle of Olive Oil Over Medium Heat.
- Add Chopped Onion and Sauté Until It’s Softened and Translucent.
- Stir in Minced Garlic and Grated Ginger, and Cook Until Fragrant.
- Sprinkle Curry Powder, Ground Cumin, Ground Coriander, and Turmeric Powder Over the Onion Mixture. Stir to Coat the Onions With the Spices.
- Add Chicken Pieces to the Pot and Cook Until They’re No Longer Pink on the Outside.
- Add Chopped Vegetables to the Pot and Sauté for a Few Minutes.
- Pour in Canned Diced Tomatoes, Along With Their Juices. Stir Well to Combine.
- Add Coconut Milk and Chicken Broth or Water to the Pot. Mix to Create a Flavorful Base.
- Let the Curry Simmer for About 15-20 Minutes, Allowing the Flavors to Meld and the Chicken and Vegetables to Cook Through.
- Season the Curry With Salt and Pepper to Taste.
- Once the Chicken is Cooked and the Vegetables Are Tender, Remove the Pot From Heat.
- Serve the Chicken and Vegetable Curry Hot, Garnished With Fresh Cilantro Leaves.
- Enjoy the Curry With Rice or Naan Bread.
Chicken and vegetable curry, a tapestry of protein and color, invites us to embark on a culinary journey through aromatic spices and tender delights. In the pot’s embrace, onions sauté—a prelude to a symphony of flavors. Garlic’s allure and grated ginger’s freshness join the ensemble, their notes harmonizing with each stir. Curry powder, cumin, coriander, and turmeric become a palette of warmth and vibrancy, infusing the kitchen with their fragrant dance.
Banana Oat Muffins
Gluten-Free Recipes
Utensils Needed:
Ingredients:
- Preheat the Oven to 350°f (175°c) and Line a Muffin Tin With Muffin Liners or Lightly Grease With Cooking Spray.
- In a Mixing Bowl, Combine Mashed Bananas, Greek Yogurt or Buttermilk, Eggs, Honey or Maple Syrup, and Vanilla Extract. Mix Well Until Smooth.
- In a Separate Bowl, Whisk Together Rolled Oats, Flour, Baking Powder, Baking Soda, Salt, and Ground Cinnamon.
- Gradually Add the Dry Ingredients to the Wet Ingredients, Stirring Until Just Combined. Be Careful Not to Overmix.
- If Desired, Fold in Optional Add-ins Such as Chocolate Chips, Chopped Nuts, or Dried Fruits.
- Scoop the Muffin Batter Into the Prepared Muffin Tin, Filling Each Muffin Cup About 3/4 Full.
- Bake the Muffins in the Preheated Oven for About 18-20 Minutes, or Until a Toothpick Inserted Into the Center of a Muffin Comes Out Clean.
- Once Baked, Remove the Muffins From the Oven and Let Them Cool in the Muffin Tin for a Few Minutes Before Transferring Them to a Wire Rack to Cool Completely.
Banana oat muffins, a blend of comfort and wholesomeness, invite us to indulge in the simple pleasure of homemade baked goods. In the mixing bowl, ripe bananas transform—a mash of sweet nostalgia that speaks of cozy kitchens and cherished moments. Greek yogurt or buttermilk, eggs, honey or maple syrup, and vanilla extract mingle, forming a symphony of flavor and moisture. In another bowl, oats meet flour, baking powder, baking soda, salt, and ground cinnamon—a chorus of textures that promise warmth and satisfaction.
Gluten-Free Chocolate Brownies
Gluten-Free Recipes
Utensils Needed:
Ingredients:
- Preheat the Oven to 350°f (175°c) and Grease or Line a Baking Dish With Parchment Paper.
- In a Microwave-safe Bowl or Using a Saucepan on Low Heat, Melt the Chopped Chocolate and Butter or Coconut Oil Together, Stirring Until Smooth. Let It Cool Slightly.
- In a Mixing Bowl, Whisk Together Granulated Sugar or Coconut Sugar, Eggs, and Vanilla Extract Until Well Combined.
- Pour the Melted Chocolate Mixture Into the Bowl With the Sugar and Egg Mixture. Mix Well.
- Add Almond Flour, Cocoa Powder, and a Pinch of Salt to the Mixture. Stir Until Everything is Fully Combined.
- If Desired, Fold in Optional Add-ins Such as Chopped Nuts or Chocolate Chips.
- Pour the Brownie Batter Into the Prepared Baking Dish and Spread It Evenly.
- Bake the Brownies in the Preheated Oven for About 25-30 Minutes, or Until a Toothpick Inserted Into the Center Comes Out With a Few Moist Crumbs.
- Once Baked, Remove the Brownies From the Oven and Let Them Cool in the Baking Dish for a While Before Transferring Them to a Wire Rack to Cool Completely.
- Once Fully Cooled, Cut the Brownies Into Squares or Desired Shapes.
Gluten-free chocolate brownies, a celebration of decadence without compromise, invite us to experience the joy of rich and fudgy treats. In a mixing bowl, sugar and eggs unite, whisking to create a symphony of sweetness and structure. Melted chocolate and butter or coconut oil blend—a potion of velvety richness that whispers of indulgence. Almond flour and cocoa powder join the dance, their gluten-free embrace transforming the mixture into a canvas of chocolate perfection.
Conclusion
In conclusion, the compilation of gluten-free recipes navigates a culinary realm that celebrates both dietary necessity and flavorful exploration. From enticing mains to delectable desserts, these recipes exemplify the boundless possibilities of gluten-free cooking. By embracing these recipes, you embark on a journey that transforms dietary restrictions into a palette of creativity, proving that gluten-free meals can be as delicious and diverse as their conventional counterparts.
Whether you follow a gluten-free diet out of necessity or choice, these recipes stand as a testament to the art of crafting meals that prioritize health without sacrificing taste. As you savor the medley of ingredients and savor the satisfying flavors, these recipes remind us that gluten-free cooking is an invitation to reimagine culinary possibilities and embrace a vibrant, flavorful, and healthful approach to food.
FAQ’s
Can I Personalize These Gluten-free Recipes to Align With My Taste Preferences?
Certainly. These recipes can be customized by substituting ingredients or adjusting seasonings to match your unique taste and dietary requirements, while still maintaining their gluten-free essence.
How Do These Gluten-free Recipes Cater to Newcomers to Gluten-free Cooking?
These recipes make transitioning to gluten-free cooking enjoyable and seamless, offering an opportunity to discover new ingredients and techniques while still indulging in flavorful meals.
Are These Recipes Suitable for Various Dietary Preferences in Addition to Being Gluten-free?
Absolutely. While these recipes are primarily gluten-free, they often cater to various dietary preferences, including vegetarian, vegan, and dairy-free options.
Can I Find Gluten-free Alternatives for Traditional Ingredients in These Recipes?
Yes, many of these recipes provide gluten-free alternatives to common ingredients like flours, pastas, and breadcrumbs, making them accessible to those who avoid gluten.
Can I Expect These Recipes to Be Both Flavorful and Safe for Those Avoiding Gluten?
Definitely. These recipes are designed to deliver both satisfying flavors and gluten-free options, proving that dietary restrictions need not compromise on taste.
To Read More Similar Articles, Click Here.
Thanks for Visiting Our Website. If You Appreciate Our Work, Kindly Show Us Some Support in Our Comments Section 🙂


