We present a compilation of uncomplicated culinary creations: Simple Recipes. In this article, we present a selection of uncomplicated but delicious dishes that can be prepared with ease by individuals. From appetizers to desserts, these recipes are tailored to help budding cooks enjoy cooking without overwhelming them.
Whether you’re a beginner in the kitchen or just looking for a convenient meal, Easy Recipes offers step-by-step instructions and simple ingredients that make the world of culinary delights accessible to all. Embark on a flavorful journey as we uncover the secrets behind preparing dishes that show cooking can be both simple and satisfying.
9 Easy Recipes to Brighten Your Day
Grilled Cheese Sandwich
Easy Recipes
Utensils Needed:
Ingredients:
- Place a Frying Pan or Griddle Over Medium Heat.
- While the Pan is Heating, Take the Slices of Bread and Lay Them on a Cutting Board.
- Place a Slice of Cheese on One of the Bread Slices and Then Cover It With the Other Slice, Creating a Cheese Sandwich.
- Spread a Thin Layer of Butter on the Outer Side of Each Slice of Bread. This Will Help Achieve That Crispy and Golden-brown Texture.
- Once the Pan is Heated, Place the Buttered Sandwich Onto the Pan. Cook for About 2-3 Minutes on Each Side or Until the Bread Turns Golden and Crispy, and the Cheese Inside Melts.
- Use a Spatula to Carefully Flip the Sandwich and Cook the Other Side.
- Once Both Sides Are Nicely Toasted and the Cheese is Melted, Remove the Sandwich From the Pan and Place It on a Plate.
- Let It Cool for a Minute Before Slicing It in Half With a Bread Knife.
- Serve Your Delicious Grilled Cheese Sandwich While It’s Still Warm and the Cheese is Gooey.
The classic comfort of a grilled cheese sandwich lies in its simplicity and irresistible taste. As the buttered bread sizzles on the pan, a symphony of aromas fills the air, promising a satisfying crunch with every bite. The cheese, oozing and melty, bridges the gap between the slices, creating a harmonious blend of textures and flavors.
Scrambled Eggs
Easy Recipes
Utensils Needed:
Ingredients:
- Crack the Eggs Into a Mixing Bowl. Add a Pinch of Salt and a Dash of Pepper.
- Use a Whisk or Fork to Beat the Eggs Until the Yolks and Whites Are Well Combined and Slightly Frothy.
- Place a Non-stick Skillet Over Medium-low Heat. You Can Add a Small Amount of Butter or Cooking Oil to Prevent Sticking, but It’s Optional.
- Once the Skillet is Heated, Pour the Beaten Eggs Into It.
- Allow the Eggs to Sit Undisturbed for a Few Seconds Until the Edges Start to Set.
- Gently Push the Eggs From the Edges Toward the Center Using a Spatula, Allowing the Uncooked Parts to Flow to the Edges.
- Continue Gently Stirring and Pushing the Eggs Around the Skillet, Breaking Up Larger Curds as They Form.
- Cook the Eggs Until They Are Mostly Set but Still Slightly Creamy. Be Careful Not to Overcook, as the Residual Heat Will Continue to Cook the Eggs Even After You Remove Them From the Heat.
- Remove the Skillet From the Heat Just Before the Eggs Are Fully Cooked, as They Will Continue to Cook in the Residual Heat.
- Plate the Scrambled Eggs and Serve Them Immediately While They’re Soft, Creamy, and Piping Hot.
Scrambled eggs, the epitome of breakfast comfort, undergo a mesmerizing transformation in mere minutes. As eggs meet the warm skillet, they curdle into soft, delicate folds, releasing an aroma that awakens the senses. The simple act of pushing and folding with a spatula turns the eggs into a creamy, dreamy mound of perfection. Seasoned with a touch of salt and pepper, these scrambled eggs offer a warm embrace of flavor in every bite.
Pita Bread Pizza
Easy Recipes
Utensils Needed:
Ingredients:
- Preheat Your Oven to the Temperature Recommended on the Pita Bread Packaging (Usually Around 375°f to 400°f or 190°c to 200°c).
- Place the Pita Bread Rounds on a Baking Sheet or Pizza Stone.
- Spread a Layer of Pizza Sauce on Each Pita Bread Round, Leaving a Small Border Around the Edges.
- Sprinkle a Generous Amount of Shredded Mozzarella Cheese Over the Sauce.
- Arrange Your Chosen Toppings Over the Cheese.
- Drizzle a Little Olive Oil Over the Toppings to Enhance Flavor and Promote Browning (Optional).
- If Desired, Sprinkle Dried Oregano or Italian Seasoning Over the Toppings for Extra Flavor.
- Carefully Transfer the Baking Sheet or Pizza Stone to the Preheated Oven.
- Bake for About 8-10 Minutes or Until the Cheese is Melted and Bubbly, and the Edges of the Pita Bread Are Golden and Crisp.
- Use a Spatula to Remove the Pita Bread Pizzas From the Oven and Let Them Cool for a Minute Before Slicing.
- Serve Your Delightful Pita Bread Pizzas While They’re Still Warm and Loaded With Your Favorite Flavors.
Pita bread pizzas, a creative twist on the classic favorite, exemplify the art of culinary adaptation. With a foundation of pillowy pita bread, these mini masterpieces are transformed into canvases of flavor. The aroma of baking cheese and savory toppings fills the air as each bite delivers a harmonious blend of textures and tastes.
Fruit Salad
Easy Recipes
Utensils Needed:
Ingredients:
- Wash All the Fruits Thoroughly Under Running Water and Pat Them Dry.
- Prepare the Citrus Fruits by Squeezing Their Juice Into a Small Bowl.
- Peel and Chop the Assorted Fruits Into Bite-sized Pieces and Place Them in a Mixing Bowl.
- Pour the Freshly Squeezed Citrus Juice Over the Chopped Fruits. The Citrus Juice Will Add a Zesty and Refreshing Flavor to the Salad and Help Prevent the Fruits From Browning.
- Gently Toss the Fruits in the Mixing Bowl to Coat Them With the Citrus Juice. Be Careful Not to Crush the Delicate Fruits.
- Once the Fruits Are Evenly Coated, Your Fruit Salad is Ready to Serve.
- You Can Also Refrigerate the Fruit Salad for a Short While Before Serving if You Prefer It Chilled.
Fruit salad, a vibrant medley of nature’s sweet treasures, captures the essence of health and vitality in every colorful bite. As the knife slices through the ripe fruits, their aromatic fragrance fills the air, inviting anticipation. The bowl becomes a canvas, painted with a riot of hues, textures, and flavors, creating a mosaic of taste sensations. The gentle drizzle of citrus dressing adds a lively zest, enhancing the natural sweetness and preserving the fruits’ tender integrity.
Greek Yogurt Parfait
Easy Recipes
Utensils Needed:
Ingredients:
- Start by Adding a Layer of Greek Yogurt to the Bottom of Your Glass or Parfait Dish. You Can Use Plain or Flavored Greek Yogurt, Depending on Your Preference.
- Sprinkle a Layer of Granola on Top of the Yogurt. The Granola Adds a Delightful Crunch and Texture to the Parfait.
- Add a Layer of Fresh Fruits Over the Granola. Choose Your Favorites, Such as Berries, Sliced Bananas, or Chopped Mango.
- Drizzle a Small Amount of Honey or Maple Syrup Over the Fruit Layer for Extra Sweetness, if Desired.
- Repeat the Layers Until Your Glass or Dish is Filled, Ending With a Final Layer of Yogurt on Top.
- Optionally, Sprinkle Nuts or Seeds Over the Yogurt Layer for Added Nutrition and Crunch.
- Your Greek Yogurt Parfait is Now Ready to Enjoy!
The Greek yogurt parfait, a symphony of flavors and textures, transforms everyday ingredients into a harmonious masterpiece. Layer by layer, the glass becomes a canvas for creativity. The velvety Greek yogurt anchors the parfait with its creamy richness, while the granola provides a satisfying crunch that complements the yogurt’s smoothness. Fresh fruits burst with vibrant colors and refreshing juiciness, infusing the parfait with nature’s sweetness.
Stir-Fried Vegetables
Easy Recipes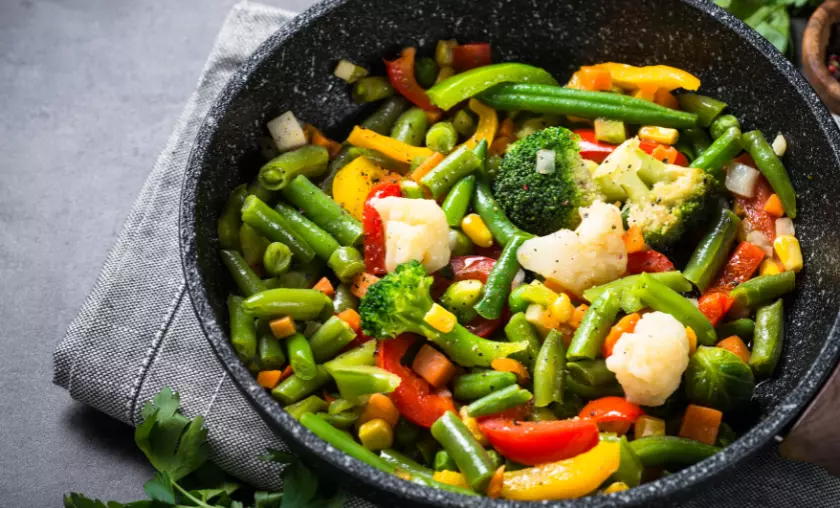
Utensils Needed:
Ingredients:
- Wash and Prepare the Vegetables by Washing Them and Cutting Them Into Bite-sized Pieces.
- Heat the Wok or Skillet Over High Heat Until It’s Hot. Add a Tablespoon of Cooking Oil and Swirl It Around to Coat the Pan.
- If Using Garlic and Ginger, Add Them to the Hot Oil and Stir-fry for a Few Seconds Until Fragrant. Be Careful Not to Let Them Burn.
- Add the Harder Vegetables That Take Longer to Cook, Such as Carrots or Broccoli. Stir-fry Them for a Couple of Minutes Until They Start to Soften.
- Add the Remaining Vegetables to the Wok and Continue Stir-frying. Keep the Vegetables Moving in the Pan by Tossing Them With a Spatula.
- Drizzle in Soy Sauce or Stir-fry Sauce to Add Flavor and Moisture to the Vegetables. Continue Stir-frying Until the Vegetables Are Tender-crisp.
- Season the Stir-fried Vegetables With a Pinch of Salt and Pepper to Taste. Be Mindful of the Salt if Your Sauce is Already Salty.
- Once the Vegetables Are Cooked to Your Desired Level of Tenderness, Remove the Wok From the Heat.
- Serve the Stir-fried Vegetables as a Side Dish or Over Cooked Rice or Noodles for a Complete Meal.
Stir-fried vegetables, a vibrant celebration of color and flavor, showcase the essence of quick and wholesome cooking. As the sizzle of the wok fills the air, the assortment of vegetables dances in the heat, transforming from raw to tender-crisp. Each slice of carrot, floret of broccoli, and jewel-toned bell pepper becomes a work of art. The optional hint of garlic and ginger infuses the dish with a tantalizing aroma that signals a culinary adventure.
Chicken Quesadillas
Easy Recipes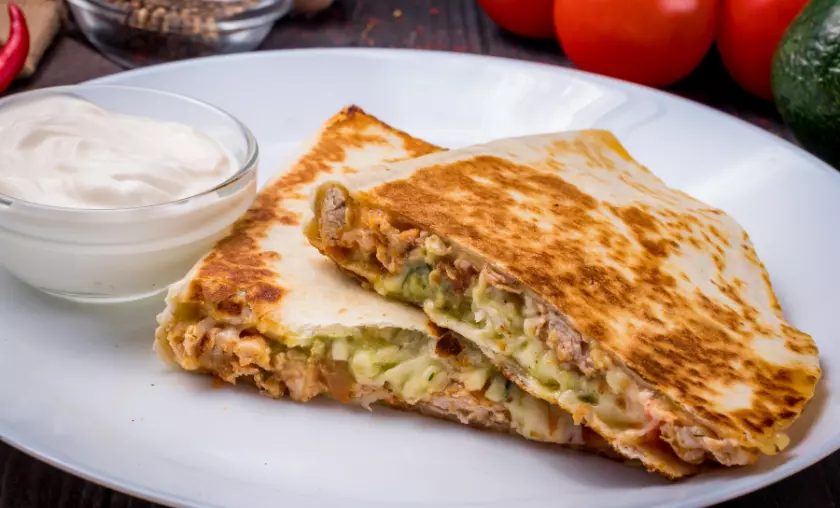
Utensils Needed:
Ingredients:
- Prepare Chicken by Shredding or Dicing.
- Heat Skillet Over Medium Heat.
- Warm Tortilla on Skillet, 20-30 Seconds Each Side.
- Place Tortilla on Clean Surface.
- Sprinkle Half With Shredded Cheese.
- Add Cooked Chicken Layer.
- Optional: Layer Onions, Peppers, Jalapeños.
- Sprinkle Another Layer of Cheese and Fold Tortilla in Half.
- Add Oil to Skillet, Cook Folded Quesadilla 2-3 Mins Each Side Until Golden and Cheese Melts.
- Remove, Let Cool, Slice, Serve With Sour Cream and Salsa.
Chicken quesadillas, a harmonious fusion of flavors and textures, epitomize the joy of Mexican-inspired comfort cuisine. As the skillet sizzles with anticipation, flour tortillas warm, becoming a tender canvas. A symphony of ingredients unfolds—succulent chicken, a blanket of melted cheese, and perhaps the gentle heat of jalapeños—all cocooned within the tortilla’s embrace.
Fried Rice
Easy Recipes
Utensils Needed:
Ingredients:
- Heat a Wok or Large Skillet Over Medium-high Heat and Add a Tablespoon of Cooking Oil.
- If Using Eggs, Scramble Them in the Wok Until They’re Cooked Through. Remove and Set Aside.
- Add a Bit More Oil to the Wok if Needed. Add Minced Garlic and Diced Vegetables, and Stir-fry Until They’re Tender.
- Push the Vegetables to the Side of the Wok and Add the Diced or Sliced Protein. Cook Until Heated Through.
- Add the Chilled Cooked Rice to the Wok. Break Up Any Clumps and Stir-fry With the Vegetables and Protein.
- Drizzle Soy Sauce and a Bit of Sesame Oil Over the Rice. Toss Everything Together to Evenly Distribute the Flavors.
- If Using, Add the Scrambled Eggs Back to the Wok and Continue Stirring.
- Season the Fried Rice With Salt and Pepper to Taste.
- Continue Stir-frying Until the Rice is Heated Through and Slightly Crispy in Parts.
- Remove the Wok From the Heat and Stir in Sliced Green Onions.
- Serve the Delicious Fried Rice as a Satisfying Meal on Its Own or as a Side Dish.
Fried rice, a culinary marvel born of resourcefulness and ingenuity, transforms humble ingredients into a flavorful symphony. As the wok sizzles with anticipation, rice, protein, and vegetables come together in a waltz of textures and tastes. The artful sizzle of cooking oil blends with the aroma of minced garlic, a fragrant prelude to a sensational feast. Each grain of rice dances to its own rhythm, infused with the umami embrace of soy sauce and the subtle depth of sesame oil.
One-Pot Chili
Easy Recipes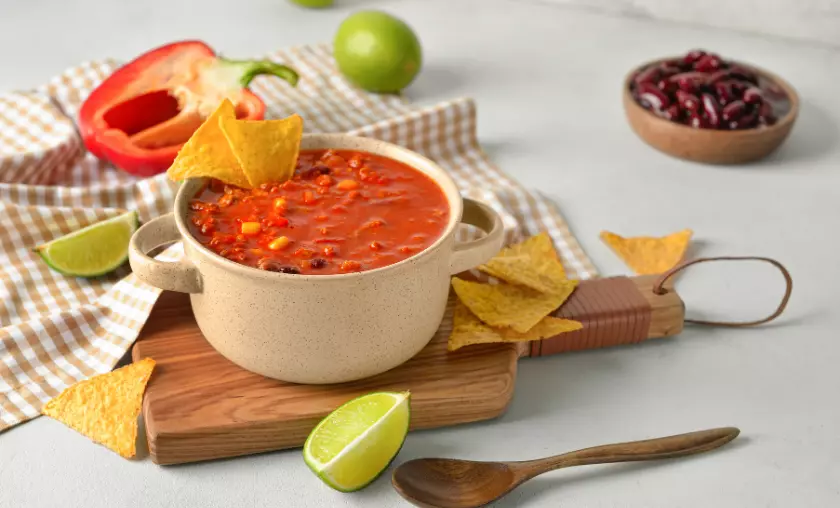
Utensils Needed:
Ingredients:
- Heat Olive Oil in a Large Pot or Dutch Oven Over Medium Heat.
- Add Diced Onion and Bell Peppers to the Pot and Sauté Until They’re Softened and Slightly Golden.
- Add Minced Garlic and Sauté for About 30 Seconds Until Fragrant.
- Add the Ground Beef or Turkey to the Pot and Cook Until It’s Browned, Breaking It Up Into Crumbles With a Wooden Spoon.
- Drain Any Excess Fat From the Meat if Needed.
- Stir in the Chili Powder, Ground Cumin, Paprika, and Cayenne Pepper (if using) to Coat the Meat and Vegetables.
- Pour in the Canned Diced Tomatoes and Drained Kidney Beans. Mix Everything Well.
- Add Beef or Vegetable Broth to the Pot, Adjusting the Amount Based on Your Preferred Consistency.
- Season the Chili With Salt and Pepper to Taste.
- Bring the Chili to a Simmer and Let It Cook for About 20-30 Minutes, Allowing the Flavors to Meld and the Chili to Thicken.
- Taste and Adjust the Seasoning if Needed.
- Once the Chili is Cooked and Flavorful, It’s Ready to Serve.
- Ladle the Chili Into Bowls and Garnish With Your Favorite Toppings, Such as Shredded Cheese, Sour Cream, Chopped Green Onions, and Cilantro.
The one-pot chili, a hearty symphony of flavors and textures, embodies the soul-warming essence of comfort food. As the pot simmers, the aromas of chili powder, cumin, and rich tomatoes fill the kitchen, arousing anticipation. Ground meat mingles with diced onions and peppers, sautéed to perfection, before embracing a harmonious blend of spices that dance on the palate.
Conclusion
In summary, these easy recipes offer both culinary ease and rich flavors for a satisfying dining experience. Suitable for kitchen beginners or those seeking quick meals, this recipe collection caters to diverse tastes. With options ranging from classic grilled cheese sandwiches and scrambled eggs to vibrant fruit salads and stir-fried vegetables, there’s something appealing for everyone.
By embracing these recipes, you not only discover delightful flavors but also achieve a sense of accomplishment through minimal effort cooking. These recipes encourage personalization and experimentation, allowing you to tailor dishes to your preferences. Whether enjoying a comforting grilled cheese sandwich or a wholesome fruit smoothie, these recipes redefine culinary convenience, harmonizing taste and simplicity.
FAQ’s
What Types of Recipes Are Covered in the “Easy Recipes” Article?
The “Easy Recipes” article covers a wide range of recipes, including classics like grilled cheese sandwiches and scrambled eggs, as well as vibrant options like fruit salads and stir-fried vegetables.
Are These Recipes Suitable for Beginners in the Kitchen?
Absolutely! The easy recipes provided in the article are designed to be accessible for kitchen beginners. They offer simple instructions and minimal effort cooking while still delivering great flavors.
Can I Customize These Recipes to Suit My Taste Preferences?
Yes, definitely. The article encourages experimentation and personalization. You can tailor each dish by adding ingredients you love, such as extra vegetables, different cheeses, or spices, to create your unique version.
How Do These Recipes Balance Convenience and Flavor?
These recipes redefine culinary convenience by offering quick and straightforward preparation methods without compromising on taste. They demonstrate that you can enjoy delicious meals without spending excessive time in the kitchen.
Can I Use These Recipes for Various Meal Occasions?
Certainly. The recipes are versatile and suitable for different meal occasions. Whether you need a quick breakfast, a satisfying lunch, or a simple dinner, you’ll find options that fit your needs in the “Easy Recipes” article.
Subscribe to our list
Don't worry, we don't spam
To Read More Similar Articles, Click Here.
Thanks for Visiting Our Website. If You Appreciate Our Work, Kindly Show Us Some Support in Our Comments Section 🙂


